Showing posts with label pinterst. Show all posts

Saturday, November 19, 2016

Harry Potter Party| 10+ crafts and games to play with Free Party Printables

We are so excited for the new Harry Potter movie, Fantastic Beasts to finally be out.  We are going to see it tonight and I figured it was finally time to share the details of Avinash's Harry Potter Birthday Party (from last year, oops!).  

 I crafted my heart out for this party.  It was a true labor of love.  And, I never could have done any of it without, you guessed it...

Amazon! 

Seriously, it saved my life so many times while planning this party.  Like, for this super amazing carnival candy table cover.  

Here are my other projects I made and games we played. 


Hogwarts Invitation Scrolls // These were such a huge hit.  I made admission letters from Hogwarts for each child and a train ticket.  I also used red fimo clay to make the wax seals for the envelopes.  The paper was scorched a little too before going out.

Paper ties in house colors //  Red/gold for Gryffindor, green/silver for Slytherin, Blue/copper for Ravenclaw and yellow/black for Hufflepuff. I created a template for the ties which makes cutting them out quick.  I used colored cardstock to make these ties.  Download the template here for free!

Letters from Hogwarts over the fireplace // I printed these out and strung them up over the fireplace with simple sewing thread.  I added some brown paper boxes to add to the sense of packing for Hogwarts and shopping in Diagonalley. The birdcage was a lucky Goodwill find.

I created a Hogwarts letterhead and scripted envelope, which you can download here.  I printed these on cream cardstock and folded them over and glued the fimo wax seals on.


Potions Class // I used a variety of bottles and jars to make this set up.  The kids and i had fun combining different liquids and food coloring to make these bottles.  I also added feathers and rocks and borax crystals to the collection.  I also have a set of printables for these potion labels available here.  Free potion printable one and free potion printable two.


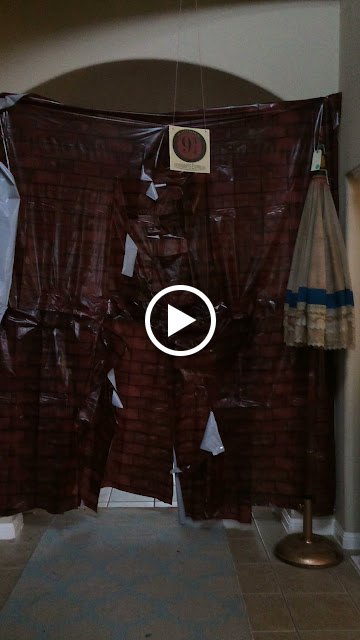
Magic Brick Wall // I made a 9 3/4 train station brick wall for the guests to run through when they entered the party.  I used a brick backdrop and cut it at a diagonal and taped it back together so it overlapped, then I cut another opening where the overlap was so it seemed to be one solid piece. The kids had such a blast running back and forth through this thing.

I designed a 9 3/4 Hogwarts Express to hang over the wall which you can download here (for free!).

Chocolate frogs and Bertie Botts Every Flavor Bean // We bought a chocolate frog mold off of Amazon and made these ourselves.  Unless you are able to stock up at Universal Studios, these are really expensive on the secondary market but everyone wants to try one!

I printed out some boxes to look like the original bean boxes just because they are so festive and colorful.  I bought several of the real things on Amazon, but the packaging is just not as nice.


Harry Potter Book Cake // We simply brought a picture of this to our local grocery store and they were able to recreate it in frosting.  We added the golden snitch using a gumball with paper wings and real prop glasses.

Flying Lessons // This was a fun little station set up outside.  I had the kids hold the broom and took several jumping shots.  They love looking back at these pictures of themselves really flying! 


Floating Candles // Amazon to the rescue again.  I bought a big pack of electric tea lights.  The great thing about these is that they stay lit for a long long time, so you can even set them up the night before. I just taped a rolled up piece of copier paper around them and strung them up on white string again.  The effect was really magical.


Sorting Hat // Ryan played Dumbledore for all the kids and put on a little sorting hat show.  Everyone got sorted and got a corresponding tie.  We also had diadems for some of the Ravenclaw girls if they wanted them.  This was such a fun part of the day. 


Bertie Bott's Every Flavor Bean // I bought a bulk case of these candies on Amazon.  This was such a fun party activity watching the looks on everyone's faces while they tried earthworm and earwax and vomit! Ha!


Pumpkin Juice // Much like the OG pumpkin spice latte, there is no actual pumpkin in this.  All for the better I say.  Mostly apple cider and cinnamon.  It was good!


Wizard & Witchcrafts // I bought crafting kits from Oriental Trading Company and Target for the kids to do.  They mostly couldn't sit still long enough, so people just brought these home with them.  It's easy to find around Halloween.


 Butterbeer Floats //  I used my own recipe and served these at the party as well.  They were a big hit.  The secret is lots of good caramel. 


Thanks so much for taking a look at our fun Harry Potter Party.


Thursday, March 24, 2016

Mexican Beach Fiesta Birthday Party Planning

We had an awesome DIY Mexican Fiesta at the Beach Fifth Birthday Party for Nandini this year.  We did a lot of fun projects to put this party together and it turned out to be a blast.

I turned to pinterest for inspiration of course.  Because I was working with a pretty unique theme I had to pull ideas from different places.

I started with Fiesta and Cinco De Mayo Inspiration Pins.  I love the big big tissue paper flowers.  I have made garlands on a small scale for Diwali, but I really loved the impact of the big colorful flowers (click through for sources).


As far as trends go the cactus trend was one I couldn't pass up.  Plus, they seem to pair perfectly well with fringe and I have a perfectly good pair of Martha Stewart fringe scissors coming to no good use.  I made most of mine by hand, but I also picked up one of these Martha Stewart kits for extra big and beautiful ones. 


I have used the fringed invitation idea on a layout in the past and I was excited to pull it out again.  


I also really loved this wooden cactus from Ann Marie Loves. I also love how she kept her party theme very minimal and easy.  Great inspo right there. I ended up going even easier and making mine out of cardboard and putting crepe paper fringe on it. 

This baby shower was the opposite of that but man did it floor me.  Beach themed party ideas galore!  I got Mexican coke bottles instead of course. 


Printable food tags were a no brainer.  I just tweaked these printables to suit our menu and color theme. 


I spent a large portion of my days making crepe paper flowers for two weeks.  I love seeing the progression as my window fills up with color. 


 I really wanted a way to keep the theme Mexican along with beach and this giant fringed cactus really seemed to fit the bill.  It was just so lovely and colorful, it was fun to even just have around the house for a few days.

 I bought a ton of real flowers and cacti too to decorate the tables with.  I bought potted flowers so that I could plant them after the party and can hopefully enjoy them for a long time to come.

See all my posts about the Mexican Beach Fiesta here:
Photobooth and Props
Cactus DIY
Printable Labels
The Party

See my other parties here.

Thursday, April 10, 2014

Pin to Page: You're a Good Egg Layout

Welcome to the another installment of from Pin to Page on my blog.  I intended to make this a regular feature on my blog, so get ready for the third post in only eight months.  I know, I'm like a machine.

Seriously though, I do spend way too much time browsing Pinterest and shockingly little time doing anything at all with said pins.

I keep looking at this pin.  So I decided to do something with it.  I love the idea of decorating wooden eggs, but my god, have you seen the cost?  No way I am paying $5 per egg.  Playing with paper it is!


This is what I did with it.  I got my Studio Calico kit super early this month so I pulled all of my papers and elements from that.  I choose a neutral background patterned paper but added a little more depth to it with watercolor.  Then I couldn't stop myself and I watercolored the other patterned paper I used here.  For the eggs I used a mix of patterned paper, washi tape, watercolor, colored vellum and stamps. 

I wanted to share the cut file I made with you as well.  If you like it, I'd love it if you would share it with your friends on pinterest, twitter, etc. 
Download the free cutting file here.

You can find my other Pin to Page posts here, and my other Freebie posts here.

Wednesday, September 25, 2013

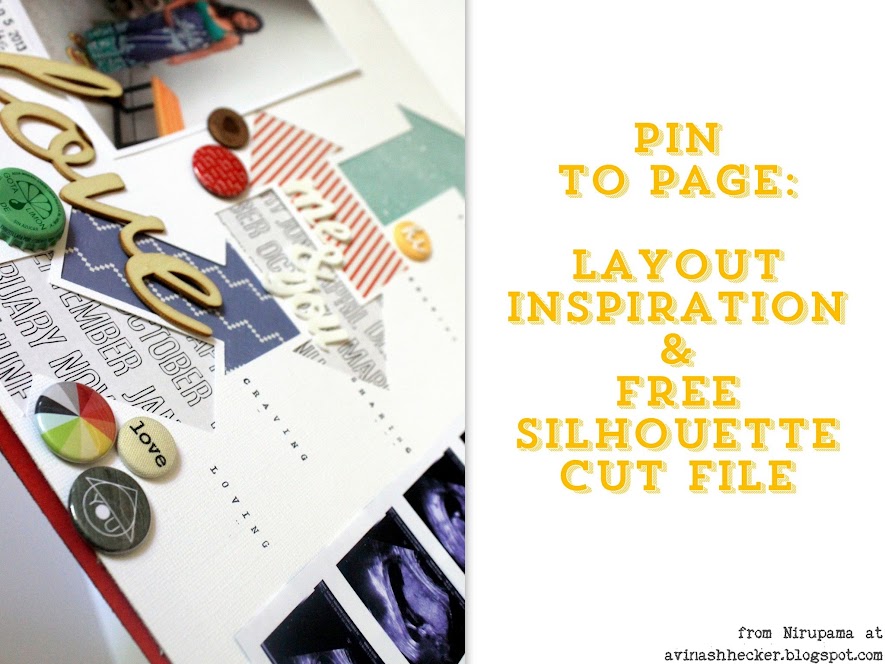
Me & You, a Hello Story Layout and free cut file.


Last week's Hello Story prompt was all about dichotomies.  My first thought went to Avinash and Nandini.  I could easily talk about their differences. When I came across this image of stacked arrows (as a bookcase!), I thought it would be the perfect starting point for a layout.


For some reason I often put up this mental roadblock to using my silhouette.  It sits out next to my printer and really just takes a few minutes to use, even when I am making my own (simple) cut file.  I pushed that roadblock aside and had this design made and cut in a few minutes.


After I had it cut out and I started putting it together I felt that it would work very well for a page about me and the new baby.  I don't know that I have done any pages at all about the new baby and I have been holding on these ultrasound photos for weeks.  I scanned then and tried to increase the clarity a little.  I printed them a bit smaller so they would look a little less grainy.  The only reason they have a bluish tint is because my printer was running out of yellow ink.  I decided I liked the look and kept them just like that.


I pulled out this sheet of patterned paper from Paislee Press.  I love the graphic feel and it fits the theme really well.  The other papers I pulled from recent Studio Calico kits.  Super easy to coordinate together.
I thought about filling the arrows with 'stuff' and I think that could be a really fun way to go with this too.  I ended up playing around with different circles: flair, some burnished wood, a brad and a topo chico sparkling water bottle cap.  (That stuff is like perfect if  you are pregnant.)


 I added the big wooden die cut from dear Lizzy as my title.  The white foam thickers are new Amy Tangerine.  That background paper is this new mountain design from Studio Calico.  (I also cut out the middle and immediately used that on another layout.) I wanted to record some of my recent feelings/happenings here but leave some of the white space intact.  I used the new big roller stamp from Pebbles to create subtitles for my journaling.  Feeling, growing (the baby and I!), sharing, craving and loving.  I filled it in afterwards, just some stuff that has been on my heart.  Also foods, apparently.

We had our twenty week ultrasound taken this week as well.  I only want to find out the gender if it will make us and the children feel more connected to the baby.  I made the tech write it down for us in an envelope but we haven't figured out if we are going to look at it or not. Any bets on the gender?


I wanted to share the cut file I made with you as well.  I think it would work well for any dichotomy page.  Me&You.  Boy&Girl. Here&There. Etc.  Click here to download the cut file.  If you like it, I'd love it if you would share it with your friends on pinterest, twitter, etc. 


Related Posts Plugin for WordPress, Blogger...