Saturday, December 14, 2013

December Daily 2013 | Day 12 and 12 blessings

 I used Ali's prompt for 12 blessings on the 12th.  What a wonderful way to pause and reflect, in the middle of this holiday season.  Even this project is such a blessing to me because of the opportunity to reflect and savor this season and this time of life it offers me.  

 I wanted a structured way to include my list so I penciled in some straight lines and used them as guides for my writing.  I also stitched a red border around the whole page.  I just love the way red stitching sets everything off. 


 I used enamel dots as bullet points for my list.  The label is from SC blue note and the letters are KP, they are just the perfect bright shade of red I am always looking for. 

I couldn't resist adding a picture, a collage of some random shots in the kitchen the other night.  I cut a card from this Allison Kreft overlay and stitched our initial on to it as a see through element for the spread.

 The blessings card, wood veneer and snowflake are from SC.

Finally, for the back I had to include this story about Avinash from the day.  The fa lalala card is KP, as are those red letters again.  I edited this photo with the A Beautiful Mess app.  I think that snowy border is my fave right now.


Thanks for visiting! In my etsy shop, in addition to my washi tape samplers I added a holiday set as well.  This set is cool because it comes with red and gold glitter twine and glitter ribbon.  Check out the Christmas washi tape sampler here.  I really had fun with the colors here, lots of red, green, silver and gold with pops of teal, chalkboard and lime. Every order from now until the end of December also comes with a free gift. Use code WASHI for 10% off any order or code RAINBOWS for free domestic shipping. 

Friday, December 13, 2013

December Daily 2013 | Day 11

 This is my spread for day 11.  I focused on how we decorated the tree that day and the day prior.

 I love the simplicity of a big photo and a few embellishments.  Cut file and photo overlay are both Ali Edwards.

Feel like something is missing from this journaling card, just not sure what.  Still might play around with it tomorrow. 


 So, I did decide to go back and play with this spread.  Minor edits really.  I split up the days into their own spread and printed out another big picture from the tenth with Avinash in it. I added a piece of patterned paper, layered with a die cut.  I used one of the circles for a bit more journaling.  I stamped Happiness directly onto the ribbon, worked like a charm!

I used my Hero Arts paint daubers to add some confetti/bokeh polka dots to the journaling card.  I think it really helps a square of cardstock feel more finished. 

 twinkle twinkle? why not.  I love this die cut so much I used it twice.  On this page I used silver embossing powder to finish it. 

 Here I used the same die cut but first I dabbed it with white brilliance ink for subtle shimmer and then layered some brown chalk ink on top.  I also switched the stamped sentiment to silver brilliance ink.  It is less glaring than the black ink I had before.

 What do you think? Worth the effort?  To me it is because I love the full page photos. 

 I posted a ton of pictures around our house today as well.  Check it out if you want to see our holiday decor. Thanks and happy Friday!

Thursday, December 12, 2013

Handmade Holiday Style | 2013 Home Tour, Twinkle Lights, Hanging Stars and Target Ornament Crafts

This is my yearly holiday home tour.

I love setting up little vignettes around the house.  90% of my stuff is from Target, with some handmade crafts sprinkled in.


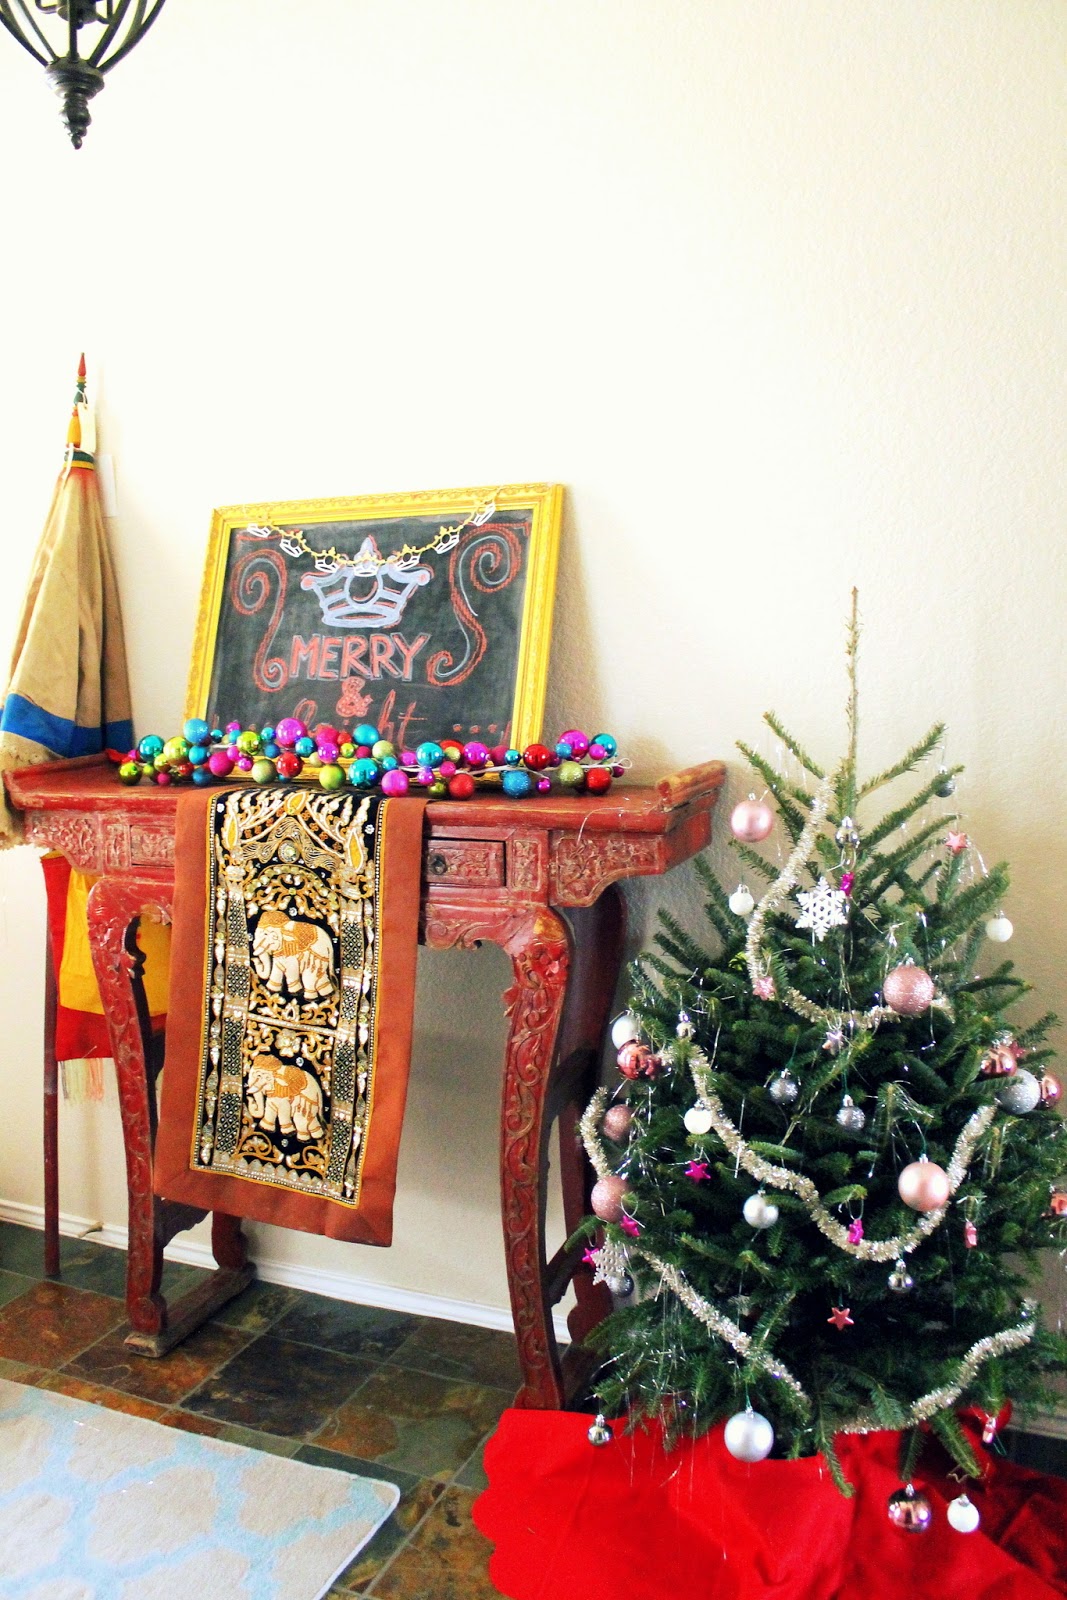
Our 'Charlie Brown' tree from the Tree Farm, decorated in pink + silver near our entrance way.  I made the chalkboard frame myself and added an ornament garland from Target.


 The crowns are a project for Jenni Bowlin that I did with my silhouette.  A little bit of glitter never hurts either.

My mini marquee letters (follow the link for my pictures and how to info) from years past, also made by me. These are paper but have held up really well over time and even survived the move! This year I added some evergreen sprigs from the tree farm and Avinash's new nutcracker.

 Our mantle.  I am not a fan of the white brick or the paint color, but I did what I could with it.  The felt banner and JOY sign are from Target.  The blocks and 2 are vintage finds from Round Top. 


I actually went back and took down the felt banner.  It was too much and making everything feel too cluttered.  I like it better this way, softer, more neutral with just little pops of color.  I think it helps the little details stand out more, like the vintage number and the leaves on the Diwali layout I put out for fun. 

The hanging stars are a new DIY project I put together recently.  

DIY Hanging Stars Garland
Supplies: foraged tree branch, punched stars, cotton balls, string + needle

Instructions: I spritzed the white cardstock with a little silver before punching the stars.   I used the needle and thread to string the stars and cotton balls up.  Avinash and I worked on the cotton balls together but I did the stars myself because the paper needed a bit more pressure and I didn't want him poking himself.  I used plain cotton thread here. Then I tied the strings to the branch and situated it on the mantle.
I think it would look darling in the new baby's room too.  You know, assuming that he ever gets his own room and we somehow manage to clear all the unpacked boxes out of the spare room.


We made a lot of ornaments together too.  Mostly just decorated ornaments from Target with sharpies and ribbons.  My favorite thing was to add little silver polka dots to the frosted ornaments.  Our Glitter Ornaments we made last year have held up pretty well and went back on the tree too. 

 Our tree this year is real one.  Ryan even chopped it down himself with a little help from Avinash.  We don't have nearly the ornament collection that my parents do at home but we are slowly building and making a stash. 


Gotta love a good bokeh Christmas tree picture.  Overall our house is still pretty messy but I really enjoy having the decorations up and seeing twinkle everywhere.


Thanks for visiting! In my etsy shop, in addition to my washi tape samplers I added a holiday set as well.  This set is cool because it comes with red and gold glitter twine and glitter ribbon.  Check out the Christmas washi tape sampler here.  I really had fun with the colors here, lots of red, green, silver and gold with pops of teal, chalkboard and lime. Every order from now until the end of December also comes with a free gift. Use code WASHI for 10% off any order or code RAINBOWS for free domestic shipping.


Here are some more of my holiday posts and DIYs:


How to do Christmas Tree Bokeh Pictures


Glitter Ornaments: more Target dollar spot crafts


mini marquee letters

linked up with Kelly, the Idea Room, the Nester and Craftionary.

Tuesday, December 10, 2013

December Daily | Day 9&10

 Super simple today.  I took a few photos and printed out a favorite after looking them over with Ryan.  He loved his look of determination here. The label rub on is from my SC blue note kit, I added a strip of gold airmail washi with it and wrote my journaling on top. 

A look at the page in the album.  I used another tim holtz metal tab, this time to hold the date.


A close up look.  I added little enamel dots on the stars from the label rub on.  The top pocket holds a piece of kraft cut with some Paislee Press word art. I added a little SC word strip to echo my day 4 page about Nandini. 

Today we went to the movie Frozen with a bunch of Avinash's friends.  We also stopped by the mall next door to ride the train and carousel.  I saved all my ticket stubs and I tried to find a way to work them into the album.  I actually had to beg the attendant to let me keep the carousel tickets.  I don't know why you would bother to go through the trouble of making cute tickets, just to take them back five seconds after someone purchases them. He wrote void on the backs just in case.   The things I do for my scrapbook :)

 I ended up gluing the things I could find to a 3x5 scrap of paper and stitched around the edge.  Then I placed the card on top of a neutral patterned paper from Basic Grey, Aspen Frost.  I stamped a little date tab from the SC kit stamp and added a few stars and wooden snowflakes.

 The large silver snowflake is from the KP kit.

 I cut this SC file out of silver POW paper and paired it with one of the random photos of the day.  I probably would have left the photo plain as well, but I wanted to hide a distracting sign in the background.  Kraft dollar spot flags stapled on and stamped with the phrase, oh what fun! from an Elle's studio stamp.I love that font.

 The full spread.   SC journaling card + fabric bow.  Everything has a pinkish cast to it because apparently my belly is a functioning light reflector now and I was wearing a pink dress today.  Awesome.  I guess I need to remember to wear white when taking photos from now on, ha!


December Daily 2013 | Day 8

Today was dubbed 'art day' by Avinash after we came up with the idea to use the giant paper roll from Ikea to make a mural that would hang in his room, where the new baby can enjoy it when he is born.  We have been decorating ornaments here and there this month, but this project took up most of the day.  It was so much fun but it didn't leave me with a lot of time for scrapbooking.  Not to worry, that is what full photo pages are for!


I had my 2x2 pocket page to fill up from the day before.  I already had my big photos printed out and didn't feel like doing more so I focused on the journaling instead.  I like how it gives this side a totally different feel from the previous day. I added a gold star rub-on and a wooden tree from Target.  The tag holds the title of sorts, using the WRMK Notable chipboard alpha, from the SC Holiday add-on. A couple other bits from my KP kit.  I edged each journaling block with a gold sharpie because they looked really unfinished to me. 

I cut up a hambly transparency for a page divider.  The metal tab is from Tim Holtz (and bought on sale, thanks SC!). 

I used the Cole/Mama Elephant stamp set here, stamped in white brilliance ink.  I wanted to do this on a transparency but I am not quite sure how to stamp on them and I know I just melt them whenever I try to emboss.   I'm pretty happy with the way it turned out anyway.  That white ink has a nice shine to it, which is great for holiday projects.


I printed out a second full page photo (printed 8.5 inch square, I used a handbook insert as a tracing guide to cut it down to size).  I added the word art prior to printing.  I punched a star and used it as a stencil with this gold brilliance ink.  I stapled the bark stars on top with a little sequin.  I doubt that they would stick on there very well with just glue, so I'm hoping the staples will secure.  I probably should have used regular staples instead of the cuter but flimsier tiny ones.  I added a little red foam dot on top, instead of an enamel dot. Again, in hopes that it will stick well!

So, we have the tree.  And a little 'Charlie Brown' tree.  And a some foraged branches that I stuck in water and surprisingly really like.  Have not had the energy to trim the tree or even put up lights!  And, you know what? I'm totally okay with that. 
Related Posts Plugin for WordPress, Blogger...